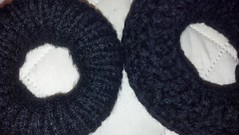
stethoscope cover
Originally uploaded by mrhodes702.
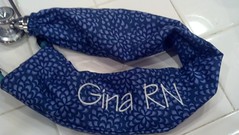
I made this stethoscope cover for my sister, Gina. I have been making her (and her co-workers) all different types of covers over the years, mainly knitted ones. I wanted to do this one because I'm just getting used to my embroidery machine and thought it might be nice to personalize her cover. I saw a cover on Etsy that uses minky on one side and I happen to have a small piece left over from a baby blanket. I will still put her name on it. She can't wait to get them! Before I forget, Here are my notes:
2 pcs - 4 1/2" x 25" for body
2 pcs - 4 1/2" x 3" for interfacing (same fabric as body)
1 pc - 4 1/2" x 4" for tab
1 pc - 3" length of 1/4" elastic
1 snap set
I serged most of the cover except for making the tab, sewing the casing for the elastic, and the top stitching around the top of the cover.
First off, I embroidered her name on one body piece. Then I made the tab by folding each 4" side towards the middle, pressed, unfolded, folded 1/2" up from one 4 1/2" side then both pressed sides toward the middle. Sew along 2 long sides and one short side. Sandwich the tab between the front piece and one interfacing piece, right sides facing, along a short side and sew. Sew the 2nd interfacting piece to the 2nd body piece, right sides facing, along a short side. Now this part might be confusing: Lift up the interfacing pieces so you have two long flat pieces and, with right sides facing, seam along one long side. Now make the casing for the elastic by folding up 1/2" on the other short side and press. Sew with a 3/8" seam allowance. Thread elastic into casing using a safety pin. As soon as the non pinned end enters the casing, tack it down so it doesn't get sucked into the casing. As soon as the pinned end exits the casing, tack it down so it doesn't get sucked back into the casing. Sew the remaining long edge, turn right side out and tuck the interfacing down into the body and top stitch 1/8" from the edge. Add one side of the snap set to the end of the tab, centering it. Add the other side of the snap, so that it corresponds to the tab, on the body. Finis!
I'm still playing around with the construction. I don't know if the tab is absolutely necessary. I may just forgo the tab on the next one and just add the snap set to the top of the cover. We shall see!