Okay, your teapot is all warm and toasty in it's sweater and teapot cozy. You pour yourself a nice hot cuppa and now what? It just sits there getting all cold!!!! Yuck! Not anymore! This cute baby of a tea cozy fits perfectly over my teacup and keeps my tea warm longer. There is nothing worse than tepid tea. I'm so excited! I'll be doing a test run of these in my Etsy store very soon...like maybe tomorrow. I just had to test it out tonight. BINGO!
Thursday, February 17, 2011
Wednesday, February 16, 2011
Cozy Teapot Sweaters
I thought I'd call these teapot sweaters because that's what they remind me of, a cozy sweater for your teapot! I now have both versions for sale on Etsy as a test run. There are several Etsy sellers who make very similar cozies but they were too cute for me not to make myself.
Tea Cozies!
I've been going crazy making tea cozies! They all fit a 6 cup pot, except for the knitted one, which I made especially for my 3 cup pot. I'll be putting some up on my Etsy shop soon! I've met a lady, Louise, who owns a local tea business and she'll be selling them as well. Her business is called Tea-rrific Teas. She will also be selling my tea wallets. It's nice to see someone get excited about things you make, isn't it?
Monday, January 10, 2011
So sad today.
The more I learn about the shooting in Tucson, Arizona yesterday, the sadder I get. Christina Green was only 9 years old, born on 9/11/01. Such a pretty little girl who was taught about the significance of her date of birth and wanted to grow up and have a life in public service. I can't imagine what her parents are going through. My heart bleeds for them. I don't consider myself overly protective although I think I'm moreso than many parents around. My youngest son will be 11 this week and I still watch him walk to school until he's no longer in my sight. I worry every time he goes out to ride his bike, calling him or making him call me when he arrives at his destination. My eldest is 18 and he doesn't understand why it's so important to call me the moment he gets "home" when he leaves here to go back to his college 3 hours away. Just thinking about not being able to see them or call them is bringing me to tears. May God bless the family of Christina Green and, of course, the families of the other shooting victims. I hope justice is swift and harsh for the shooter.
Wednesday, December 08, 2010
Keurig K Cup Rack! So excited!
Look at what my very talented husband made for me! I was so excited! Then my friend and fellow Keurig owner, Erika, stopped by and saw it! She reminded us that it was her birthday so she is now the proud owner of this new K Cup rack. Bernie didn't want me to give it to her because he said it is just a "prototype" but I loved it and so did she. I will soon be listing these in my Etsy shop for $25.00 with FREE personalization of up to 11 characters. If people don't want it personalized, he said he can fit another row of K Cups on it for a total of 18 cups.
Remember that I re-use my K Cups? I think I've finally found the method that works for me. I rinse out the coffee from the used K Cup and after drying, I fill it with my choice of coffee. I then cover it with a single sheet of Glad Press N Seal and wrap with a tiny hair elastic (not rubber band!). After the internal filter has failed, I make my own filter, again top off with Glad Press N Seal and then secure with a tiny hair elastic band. They work great! What a great way to have wonderful coffee and save money, too!
My homemade filter inside the white K Cup.
Thursday, December 02, 2010
Thanksgiving Leftovers
Sorry I don't have any pictures, but I just wanted to list some of the leftovers that we had from our Thanksgiving dinner. We had both turkey and ham with the usual fixings so there were plenty of leftovers.
Turkey:
1) Turkey sandwiches with stuffing, cranberry sauce, and mayo. A local sandwich shop calls this "the Bobby".
2) Turkey salad sandwiches. I put everything I normally put in chicken salad into these.
3) Turkey & spinach Alfredo with angel hair pasta
Ham:
1) Ham & eggs
2) Ham slices, collard greens, & rice
3) Split pea soup
I fed what was left of the turkey to the dogs but still had enough ham for about three more meals. I used my Seal-A-Meal and separated the ham into three bags, including a very meaty ham bone. For sure I'll make some red beans & rice for one meal and definitely more split pea soup. Maybe some baked macaroni & cheese with ham for the last meal. They all sound good but I have to wait for awhile before I can eat more ham. I still have another bone-in half ham that I bought before Thanksgiving because it was only $0.77 per/lb.
Between us, I'm so over Thanksgiving leftovers...we had PIZZA for dinner!
Wednesday, October 13, 2010
Re-using K Cups - Part Deux - Make your own filters!
I love re-using my K cups, especially since I've purchased the My-Kap lids. The only problem with using these is that after awhile the lids cause the filters to detach from the K cup rendering them useless. NOT ANYMORE! I always wondered how I could make my own filters to get more life out of my K cup and now there's an answer. The folks at My-Kap.com came up with a solution and I just tweaked their instructions a little so that I could use my old Melitta basket filters instead of going out and buying Melitta #4 cone filters that they suggested and with my method, there is no template required! Now it's even easier to re-use my K cups because I just lift out the used filter and replace it with a new one! Here we go:
![]() |
Cut the basket filter in 1/2 to make 2 filters |
Fold the tip up |
![]() |
Fold the open side over 3-4 times
|

![]() |
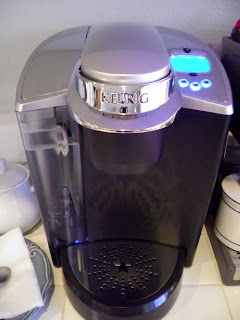
Form into a cone and place into clean K cup |
So easy to use and much easier to clean than rinsing out the used K cups. It literally takes just seconds to assemble a new filter. I hope all the Keurig lovers will try this.
**EDIT 10/27/10** This method is not foolproof. If you don't roll the edge up tight, it might fail. Also, if you're re-using your K cups, I've found that it works better if you don't use a regular drip grind. It's too coarse. Something between the drip grind and an espresso grind works well. Also, in all honesty, I prefer using the Glad Press N Seal to using the My Kap lids because it's a tighter seal and there is no leakage or dripping from the sides of the coffee maker like there is when you use the My Kap lids. The re-usable lids, however, are more convenient and once you buy them you don't have to buy anything else...other than more coffee!
**UPDATE 12/30/11** Since this post, I didn't give up trying to find a better alternative to the paper filter and I found it. I have created little filters out of unbleached cotton muslin. I have been using them for several months and they have NEVER failed! Here is the link to the post I made about them back in May.
Wednesday, September 29, 2010
Magic Box
Pat asked me to make a Magic Box for her. I just wanted to show pictures of the finished box. I don't know the recipient but I hope she will enjoy it.
New project - Everyday Cardi from Crochet Today!
This is my latest project on the hook right now. I love the look of this cardigan and thought it was really easy until I got to the point where I have to start working the fronts and back. I find the instructions very confusing and have had to put it aside today because I was getting frustrated trying to figure it out. I'm not a novice crocheter and that's what makes it even more frustrating that I can't figure this out. I'll jump back on it tomorrow and if I can't work out the instructions, I'll finish it on my own.
I'm using Caron One Pound in Claret. I started off with another yarn but didn't have enough to finish it. I'll post a picture of my cardi if/when it's done.
Saturday, September 11, 2010
Latest crochet project
My truck has been in the shop for a couple of weeks. I was feeling a bit stranded, even though I've been taking my husband to/from work and have his truck, and had the urge to crochet something just to keep me busy. I started off with a coaster/scrubbie set and my friend, Mel, suggested that since I'm stuck at home that I should get a start on some Christmas gifts. Great idea, Mel! While searching Etsy.com for ideas, I came across a pattern called Oma House Slippers and thought they were the cutest things. I've made 4 pairs so far and have many more to go. They're very easy although the pattern isn't easy to memorize since every round is different. They're also quite comfortable!
How to brew tea with your Keurig
Sorry, nothing earth-shattering here. A good cup of tea still takes a bit of time to make. With the Keurig it's a little faster thanks to the rapid heating of the water, but you still have to let it steep. I bought some Celestial Seasonings Iced Black Tea K Cups yesterday and the ingredients listed were black tea and tea extract, which, I'm assuming, is why you can brew a cup of tea so quickly if you use these. However, I thought the tea that it brewed was too strong and bitter. I wasn't thrilled. Here's how I do it: I use my Finum tea brewing basket and the appropriate measure of tea. Select the cup size I want and brew. Let it steep 3-5 minutes. Drink as is or pour over ice. Not hard. With this method, I can't brew directly into a cup of ice but I don't really mind. Did I say I tried putting tea into a used K Cup the same way I make coffee? Ha! Light brown colored water that did not taste at all like tea.
How to re-use your Keurig K cups
Meet Hans, our new Keurig B66 coffee maker. After trying one out last week at the tire store, I could see that my husband wanted one. What I liked the most is that he could make a cup of coffee...BY HIMSELF! My friend, Pat, picked it up for me at Sam's Club for $129.99 and it came with the water filter and 72 K Cups. Having already done some research on it, as I usually do with any big purchase, I had already found ways to save money by using my own coffee. Two of which involve re-using the K Cup containers themselves and the other involves using Keurig's My K Cup. I've already ordered the K Cup Kaps on eBay but until they come, I've found a way that works wonderfully. It involves one of my favorite household items...Glad Press N Seal! All you have to do is peel the foil off a used K Cup, rinse it out, then fill with your favorite coffee (about 1 TBSP). Place two 2 1/2" x 2 1/2" pieces of Glad Press N Seal over the top and press them down all around the cup to seal well. Place it into the Keurig and try to align the existing puncture with the needle in the housing (it's not hard to feel) and brew as usual. Easy! I've read that you can re-use each K Cup at least 10 times! How's that for being frugal! Another tip: My husband and I like our coffee on the mild/medium side and we typically drink our coffee in 16 ounce mugs. My Keurig has 3 settings: 6 oz, 8 oz, & 10 oz sizes. To make our coffee the way we like it I place the K Cup in the Keurig and brew an 8 oz cup. When the machine says it's ready to brew another cup I just lift the lid as if I were going to place another K Cup into it but leave the old one there, close the lid, then brew a 6 oz cup. This leaves room for the abundance of cream we like in our cups.
Gift card holder

Monday, July 05, 2010
Chris-ism for today
My son, Chris, is 10 years old. Some of the things that come out of his mouth amaze me! I've decided I'd better keep track of some of the better ones so I can perhaps use them later (like when he's an adult). So, here's today's Chris-ism:
Me: Son, Mel's coming to pick us up to go shopping. You'd better change your shorts.
Chris: Why?
Me: Those are too tight.
Chris: No they're not. What makes them too tight?
Me: They're hugging your butt.
Chris: Mom, my butt deserves to be hugged!
**********************
He got to wear the shorts! I was lauging my ass off too hard to argue with that one!
Tuesday, June 22, 2010
Quick Tomato Salisbury Steak
Tonight, I needed to make dinner quickly after getting home from Chris' Tae Kwon Do around 8:30 pm. I was way too lazy this afternoon to cook dinner. I had 2 lbs. of ground beef but didn't think I had time to do a meatloaf. I looked in the veggie bin and the pantry and came up with this version of Salisbury Steak. I thought it was pretty good and wanted to jot it down so I'd be able to re-create it later. Here goes:
Tomato Salisbury Steak
Beef mixture:
2 lbs. ground beef
1 egg
1/2 c bread crumbs
1/4 cup milk
1/2 - 2.8 oz can French's French Fried Onions, crushed
salt, pepper, garlic powder
Gravy:
1/2 green bell pepper, diced
5-6 button mushrooms, sliced
1 can tomato soup
1/2 soup can water
Form beef mixture into patties and brown on both sides, not cooking all the way through. Remove beef from pan. Saute bell pepper and mushrooms in a few tablespoons water to deglaze pan. When bell pepper starts to get soft, add tomato soup and water to pan, return beef patties to pan and turn to coat with gravy. Spoon gravy over top of patties. Cover and simmer on medium low for 20 minutes. Tilt lid to let steam escape if gravy gets too watery. Enjoy over mashed potatoes or hot rice.
Friday, June 04, 2010
Tea Bag Folding

Wednesday, May 26, 2010
Hershey's Nugget Box & Dove Chocolates Box

Box: 6" x 4 1/2"
With the 6" side against the top of the board, score @ 3/4", 1 1/2", 4 1/2", & 5 1/4"
With the 4 1/2" side against the top of the board, score @ 3/4", 1 1/2", 3", & 3 3/4"
Top: 5 1/2" x 3"
With the 5 1/2" side against the top of the board, score @ 3/4", 2 3/8", 3 1/8", & 4 3/4"
I then followed Beth's instructions for assembly and it turned out great! Then I got to thinking, what other candy can I put in the box? I had some little Dove chocolates but they were too big soooooooooo...
Sized to fit 3 Dove chocolates:
Box: 5 1/2" x 3 1/2"
With the 5 1/2" side against top of the board, score @ 1/2", 1", 4 1/2", & 5"
With the 3 1/2" side against top of the board, score @ 1/2", 1", 2 1/2", & 3"
Top: 4 1/2" x 3 1/2"
With the 4 1/2" side against the top of the board, score @ 1/2", 2", 2 1/2", & 4"
Subscribe to:
Posts (Atom)