Sunday, May 01, 2016
Hershey's kiss roses
List of materials:
Red cellophane wrapping, cut into 5" squares
Green cellophane wrapping, cut into 3" squares
Wooden bbq skewers or 18 gauge floral stem wire. If using wire
do not insert into the chocolate. Make a loop at one end and hold it next to the candy and wrap both in red cello.
Floral stem wrapping tape, 20" per stem
Small hair elastics. These are Goody brand
Zots medium clear adhesive dots or adhesive of choice
Hershey's kisses, one bag easily makes 2 dozen roses
Wednesday, April 06, 2016
Hello there shaker card
Sunday, April 03, 2016
My first shaker card
After watching multiple YouTube videos and looking at many pictures, I jumped in. The shaker element is separate and then adhered to the card front. The clear front of the shaker is just the packaging that a die had come in. I bought a bag of mixed sequins at JoAnn last night and have since ordered a bunch of sequins on eBay.
Also, after watching YouTube, I ordered the We R Memory Keepers Fuse tool from HSN, which is now on clearance. That's why I know I'll be making more of these!
Sunday, March 13, 2016
3x4 Pocket Mini Album
I wanted to make a couple of little pocket albums to take on vacation to visit my mom. My oldest son hasn't seen her since 2009 and her memory has been getting progressively worse. I want to fill it before we leave with pictures I take while there.
I've based my album on the Sizzix Pocket Mini Album die.
Check out this video for basic instructions to put this album together:
https://youtu.be/LAbaNKYtVnY
Here are the measurements for this little album:
You can make this entire album with 4 sheets of 8.5" × 11" paper.
6pcs - 6.5"×4.75" (pockets)
Score @ 3, 6 long side & .75" short side
1pc - 3.25"×10.5" (cover)
Score @ 1.5", 2", 6", & 6.5" on long side
1 pc - 3"×1.5" (back pocket hinge)
Closure of choice, i.e. velcro dots, mini brads, and/or twine
One difference that I made is that I stick the hinge to the back of the cover
and cut the tab off the pocket in the front of the album.
Saturday, January 30, 2016
Easel back card template
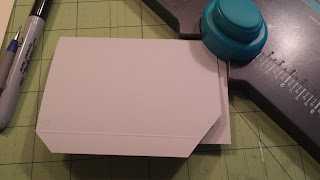
Here is my version of an easel back card, which I based on the Artistic Impressions easel card die. The idea is that you decorate the front of the card and there is an attached easel so the recipient can stand it up and enjoy it. There isn't an inside of the card. If your cardstock is a nice heavy weight you can get away with just cutting one of these and it will stand up just fine. Otherwise, cut two and make one fold from the right and one from the left. Try to line up the circle punches as closely as you can so they line up when you have the easel out.
Tuesday, January 26, 2016
Easel back birthday card
I made this card for a friend's birthday this week. I love the idea of adding an easel to the backs of my cards and actually considered buying and easel die from Artistic Impressions for $30. Good thing I played around before shelling out the cash for that! I can make a very similar card to theirs by hand. I did, however, receive the Tim Holtz easel die for Christmas, and it is very nice to have. Now that I know how to make this easel, it's just faster to cut it by hand. This easel is similar to the Tim Holtz design.
The flower & foliage were made using the Stampin Up Bouquet Bigz L die. The paper is DCWV Linen Closet.


