Sunday, September 22, 2019

Laura's Drawstring Bag With Boxed Bottom Calculator

So, we're at it again today!  I want to make a drawstring bag lined with Insulbrite and ironing board fabric to carry my hot iron after I'm done sewing at quilt club.

Laura created a calculator so that I can plug in the finished dimensions of the bag I want to sew and her calculator will tell me what my fabric dimensions need to be.

Laura's Drawstring Bag With Boxed Bottom Calculator


You will need to cut two pieces of each piece of fabric to these dimensions to create one bag.

In our example we would like our finished bag to be 5"H X 6"W X 4"D
The calculator tells us that for these dimensions, we will need to cut 2 pieces each of main fabric, cotton batting, Insulbrite, and ironing board fabric, measuring 10.5" W X 7.5" H
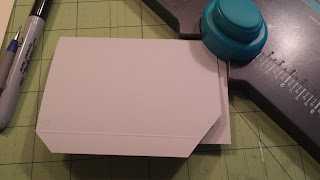
We will cut out 2" squares from each side of the bottom of the pieces, which will result in a 4" boxed bottom.
We will also need 2 pieces cut from main fabric at 10"H X 2.5" W.  These will be folded in 0.25" from each side and sewn down before folded in half the long way for each drawstring casing.

This is not a tutorial for making this bag, this just assumes you already know how to  make one and need to customize your sizing.  There are many boxed bag tutorials on YouTube.  Find one you like and follow it with your customized measurements in hand!  Good luck!

Here are pictures of my finished bag for my mini iron:


Saturday, September 21, 2019

Laura's Boxy Pouch Calculator

So, my friend, Laura, did this thing.  She created a calculator to create any sized zippered boxy pouch you want.  All you have to do is enter some measurements and it will tell you what sized fabric to start with.

Laura's Boxy Pouch Calculator

L = Length of desired pouch
H = Height of desired pouch
W = Width of desired pouch
Box corners = 1/2H - seam allowance

The resultant measurements are for the cut of fabric you'll need to make your pouch.

The box corner cut outs to create the height of the pouch are equal to 1/2H - the seam allowance.  This means that if your pouch height measures 3", you will cut a square from each corner that equals
1.25" (1/2 of 3"=1.5"- 0.25")

For example:  I want a pouch that finishes 7" L x 4" W x 3" H.  I'll sew using a 0.25" seam

allowance.

According to the calculator, I will need to start with fabric measuring L=10.5" x W=14.0".  My box corners will equal 1.25".  The zipper is ALWAYS sewn to the length side of the fabric!


You will need to know how to create a zippered boxy pouch.  There are many tutorials on the web.  This calculator just gives you measurements to make the pouch to your exact specifications.  Creating the pouch from there is the same no matter what size you make.


Sunday, July 15, 2018

Fry bread tacos (aka Indian tacos) - A pressure cooker meal!

What do you do when you need to make do with what's in your pantry and fridge?  You start watching YouTube for ideas.  This is my take on this easy and inexpensive meal, having never had a fry bread taco before.  My kids said they taste like chalupas from Taco Bell, and they kind of do.

Fry Bread

3 cups flour
2 Tbsps baking powder
1/4 tsp salt
1 1/4 cups water, warm

In large bowl, add dry ingredients and mix.  Add water and mix until all flour is incorporated.  If the dough is too wet, add flour a tablespoon at a time until it no longer sticky.  If it's too dry, add water until it is smooth but not sticky.  Cover and set aside 15 minutes.

Taco Meat

2 lbs ground beef
1 1/2 cups salsa, such as Pace Picante Sauce
1 pkt Sazon Goya
2 tsp chili powder
1 tbsp. cumin
1/2 tsp garlic powder
1 tsp minced dried onion
1 can pinto beans or kidney beans, drained
1 can corn, drained

Add all ingredients to the pressure cooker pot.  The salsa acts as your liquid so you don't need to add water.  Cover and cook at high pressure 10 minutes.  Quickly release pressure and stir to break up the meat mixture.  Use the brown or sear feature to further cook off some of the remaining liquid that has formed.

Meanwhile, in a large heavy skillet, heat at least 2 inches of oil for frying.  Break off pieces of dough a bit larger than a golf ball and roll into a ball.  Pat out flat and roll out with a rolling pin until thin and maybe 10" around.  I couldn't keep mine round but it doesn't matter.  You may have to dust your board with a little flour to keep it from sticking to your rolling pin.  Or, better yet, work round and round in your hands until the ball is stretched out thin.  Test the oil by breaking off a dime sized piece of dough and dropping it into the oil.  If it bubbles right away but isn't smoking, it's ready to start frying.  Carefully place your flattened dough into the hot oil and fry each side until golden brown.  If your oil starts smoking, reduce the heat slightly.  Drain your fry bread on a plate lined with paper towels.  I actually leaned my bread against the back of my stove (against paper towels) so they were standing, to help them drain better.  This dough recipe makes approximately 8 fry breads.

Taco Toppings

Lettuce, shredded
Tomato, diced
Cheese, grated
Sour cream
Hot sauce

Monday, January 09, 2017

Cheeseburger Corn Chowder

Tonight my husband wanted cheeseburger soup and I wanted corn chowder.  This is the compromise.

1 lb. Ground beef
1 med. Onion, diced
4 med. Yukon gold potatoes, diced
2 stalks celery, diced
3/4 c chopped carrot
2 cups chicken broth
1 can corn kernels, drained
4 Tbsp butter
1/4 c flour
2 1/2 c milk
2 c shredded cheddar blend cheese
1 tsp dried parsley
salt and pepper to taste

Brown ground beef.  Add onion, potatoes, celery, and carrot and saute until onion is translucent.   Add chicken broth, cover and simmer 25 minutes or until potatoes are cooked.  Add in corn.  In a small pan, make roux with butter and flour.  Cook roux for 3 minutes to get rid of raw flour taste.   Soup pot should be simmering while you whisk in the roux to the ground beef mixture.  Keep stirring until completely mixed and soup starts to thicken.  Add milk and stir to heat through, then add cheese and stir until cheese is melted and mixed in thoroughly.   Finally, add parsley and salt & pepper to taste.

I'm sorry, but I  couldn't take an appetizing photo of this soup :(

Thursday, January 05, 2017

White bean pork chili


We had a nice pork loin for dinner last night.  Besides one of my kids and me, no one else likes to eat leftovers in this house, so I have to get creative to make sure food doesn't go to waste. 

I like the typical white bean chicken chili and since white meat pork is mild like chicken, I thought it would translate well to this chili.  It is very quick to put together since the meat is already cooked.  Perfect for a weeknight meal!

Quick white bean pork chili

1/2 large white onion, diced
2 cups cooked pork loin, shredded
1 tbsp. ground cumin
1 tsp. dried oregano
1 lg chicken bouillon cube
2 - 15.5 oz cans Bush's white chili beans
1 bean can full of water
1 bean can full of medium salsa verde
1 can Campbell's cream of chicken soup
Shredded Fiesta blend cheese to garnish
Cooked white rice

Sauté onion in 1 tbsp. oil until translucent.  Add cooked pork and stir until heated through.  Add the rest of the ingredients except the cheese.  Stir to make sure everything is fully blended.  Simmer 20-30 minutes on low.  Serve over white rice and garnish with cheese. 

**Cooked chicken can be substituted for pork.

Sunday, May 01, 2016

Hershey's kiss roses

This is a little photo tutorial on how I make Hershey's kiss roses.  After seeing these online, I knew I had to try making them as Mother's Day is next week as is my mom's birthday.  Here we go:

List of materials:
Red cellophane wrapping, cut into 5" squares
Green cellophane wrapping, cut into 3" squares
Wooden bbq skewers or 18 gauge floral stem wire.  If using wire
do not insert into the chocolate.  Make a loop at one end and hold it next to the candy and wrap both in red cello.
Floral stem wrapping tape, 20" per stem
Small hair elastics.  These are Goody brand
Zots medium clear adhesive dots or adhesive of choice
Hershey's kisses, one bag easily makes 2 dozen roses


Wednesday, April 06, 2016

Hello there shaker card

My WRMK Fuse tool arrived yesterday and I couldn't wait to play.  I used a digi stamp from FredSheSaid and a frame punch from Hobby Lobby for this quick card.  Earlier I made some gift card holders with the photo sleeves that came with the tool but for this card I experimented with a crystal clear sheet protector.  It worked just fine for the shaker card but I like the thickness of the photo sleeve for the gift card holder.

Sunday, April 03, 2016

My first shaker card

This is my first attempt at a shaker card but I can see many more of these in my future.  I love any kind of interactive card and this one is fun!
After watching multiple YouTube videos and looking at many pictures, I jumped in.  The shaker element is separate and then adhered to the card front.  The clear front of the shaker is just the packaging that a die had come in.  I bought a bag of mixed sequins at JoAnn last night and have since ordered a bunch of sequins on eBay.
Also, after watching YouTube, I ordered the We R Memory Keepers Fuse tool from HSN, which is now on clearance.  That's why I know I'll be making more of these!

Sunday, March 13, 2016

3x4 Pocket Mini Album


I wanted to make a couple of little pocket albums to take on vacation to visit my mom.  My oldest son hasn't seen her since 2009 and her memory has been getting progressively worse.  I want to fill it before we leave with pictures I take while there. 

I've based my album on the Sizzix Pocket Mini Album die.

Check out this video for basic instructions to put this album together:
https://youtu.be/LAbaNKYtVnY

Here are the measurements for this little album:
You can make this entire album with 4 sheets of 8.5" × 11" paper.
6pcs - 6.5"×4.75" (pockets)
Score @ 3, 6 long side & .75" short side
1pc - 3.25"×10.5" (cover)
Score @ 1.5", 2", 6", & 6.5" on long side
1 pc - 3"×1.5" (back pocket hinge)
Closure of choice, i.e. velcro dots, mini brads, and/or twine

One difference that I made is that I stick the hinge to the back of the cover
and cut the tab off the pocket in the front of the album.


Saturday, January 30, 2016

Easel back card template

Here is my version of an easel back card, which I based on the Artistic Impressions easel card die.  The idea is that you decorate the front of the card and there is an attached easel so the recipient can stand it up and enjoy it.  There isn't an inside of the card.  If your cardstock is a nice heavy weight you can get away with just cutting one of these and it will stand up just fine.  Otherwise,  cut two and make one fold from the right and one from the left.  Try to line up the circle punches as closely as you can so they line up when you have the easel out.

Tuesday, January 26, 2016

Easel back birthday card

I made this card for a friend's birthday this week.  I love the idea of adding an easel to the backs of my cards and actually considered buying and easel die from Artistic Impressions for $30.  Good thing I played around before shelling out the cash for that!  I can make a very similar card to theirs by hand.  I did, however,  receive the Tim Holtz easel die for Christmas, and it is very nice to have.  Now that I know how to make this easel, it's just faster to cut it by hand.  This easel is similar to the Tim Holtz design.
The flower & foliage were made using the Stampin Up Bouquet Bigz L die.  The paper is DCWV Linen Closet.

Saturday, May 09, 2015

10 cup thermal coffee maker...for less!

For about $23 you can have a thermal pour over coffee maker.  If you buy the Melitta set, it will cost $31 - $37.  It is important that you buy a wide mouth carafe so that the filter cone will fit perfectly inside the top of the carafe.  I bought my carafe from Walmart.  It looks exactly like the one pictured but it is the Aladdin brand for the same price.  Of course, you can get reusable cloth #4 cone filters from me here!

2L stainless steel wide mouth carafe


Melitta #4 filter cone


Melitta 10 cup thermal coffee maker


Red lentil sausage stew

I absolutely love the Vegan Lentil Soup from the Fresh & Easy markets.  Not being vegan & hoping if I added meat my family might eat it, I had to try it like this.  I started off with what appeared to be a delicious vegan lentil stew recipe here:  The Perfect Vegan Lentil Stew

It looks just like the one at F&E market!  Mine does not.


I basically followed her recipe but added a keilbasa sausage and used red lentils.  It's delicious!  Thank you, Gluten-Free-Vegan-Girl!

Saturday, April 11, 2015

Applesauce Apple Pie Jam for Anthony


Today I made this jam for my son, who, upon finishing a jar my friend gave us, declared it his favorite jam.  I called my friend for the recipe but, as usual, went my own route.  It might turn out to come back and bite me in the butt if he doesn't like it.   Rather than start with fresh apples,  this jam starts with store bought applesauce.   Here we go:

Makes 7 half pints

5 cups applesauce
6 tbsp Ball dry pectin
1.5 c white sugar
1.5 c brown sugar
1/2 tsp butter
1/2 tsp ground cinnamon
1/8 tsp ground ginger
1/16 tsp ground clove
1/16 tsp ground nutmeg

Prepare jars, lids, and bands as usual for canning.

Once this process starts it moves fast, so do yourself a favor and have everything premeasured and ready to go!

Meanwhile, place applesauce, butter & pectin in a large pot and bring to a full rolling boil.  At this point add the sugars and spices and return to a rolling boil.  Keep it at a boil for one minute.

Remove from heat and immediately ladle into hot, sterilized jars.  Leave 1/4 inch headspace, get rid of large air bubbles, clean the mouth of the jar with a wet towel and place lid and screw on bands (not too tight).  Return to canning pot and process 10 minutes.