I adapted a biscuit recipe I found on the back of a Crisco can to make a great scone. I have changed it up so many ways by substituting different extracts, adding fruit, nuts, chocolate chips, etc. Whatever I add, I usually use about a 1/2 cup. This recipe makes 8 or 9 scones. Here it is:
Wednesday, April 10, 2013
Maple chocolate chip scones. Yum!
I adapted a biscuit recipe I found on the back of a Crisco can to make a great scone. I have changed it up so many ways by substituting different extracts, adding fruit, nuts, chocolate chips, etc. Whatever I add, I usually use about a 1/2 cup. This recipe makes 8 or 9 scones. Here it is:
Friday, March 29, 2013
Aerolatte...frothed milk awesomeness!
I am absolutely obsessed with frothed milk. I have a Breville espresso machine which makes great froth but since I've been using the Keurig more, I don't want to turn it on just to froth my milk. I have been using an inexpensive hand held wand-type frother that I bought on eBay and it works well but when I saw how quick the Aerolatte froths (thanks YouTube) I had to have one. I decided on the stainless steel version with stand from Amazon.com. I am in love! It makes easy work of my other new love, So Delicious Barista Style Coconut Milk Creamer.
Friday, March 15, 2013
Macarons!
Macarons
3 egg whites, aged in fridge 3 days
180 g powdered sugar
100 g almond flour (Bob's Red Mill)
I filled with cream cheese frosting and jam or cream cheese frosting and Nutella.
Please follow the video for instructions.
I'm really excited because I was led to believe these cookies were hard to make. They were not.
Friday, March 01, 2013
Afternoon tea @ English's Quintessentially British

After tea, Steph and I hit the Teavana store. I really wasn't expecting to buy anything but because it is my birthday month I treated myself to this Russian inspired infuser mug. Years ago, I fell in love with the Cobalt Net pattern from the Lomonosov Porcelain Factory in St. Petersburg, Russia but it is out of my price range at $80 per cup and saucer set. This infuser mug was only $21.95! Of course, what good is a new tea cup without new tea? A customer ahead of my bought some of this Cococaramel Sea Salt herbal tea and when the tin was opened, it smelled so good! I usually don't like Rooibos but I am willing to try this one. It has bits of chocolate, caramel, and sea salt. How can that be bad?Monday, January 07, 2013
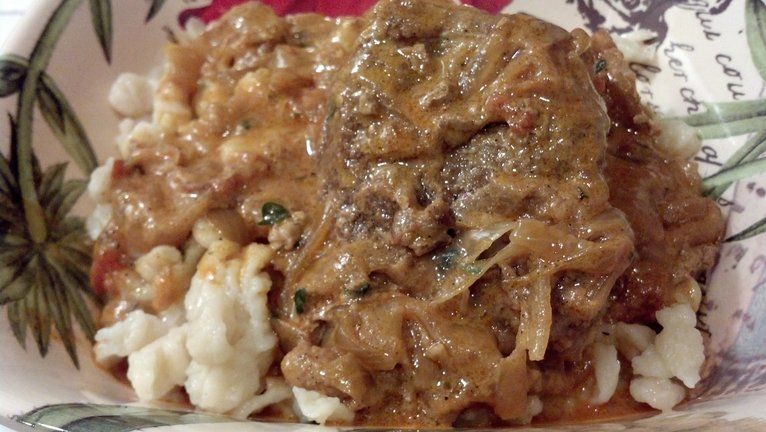
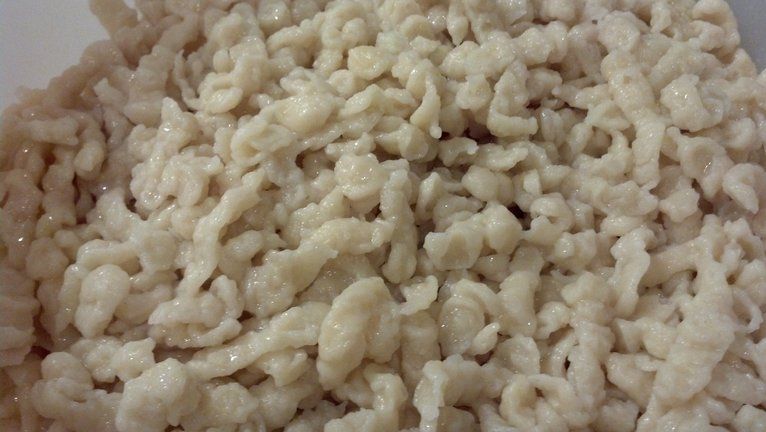
Pork Paprikash with Nokedli
Pork Paprikash
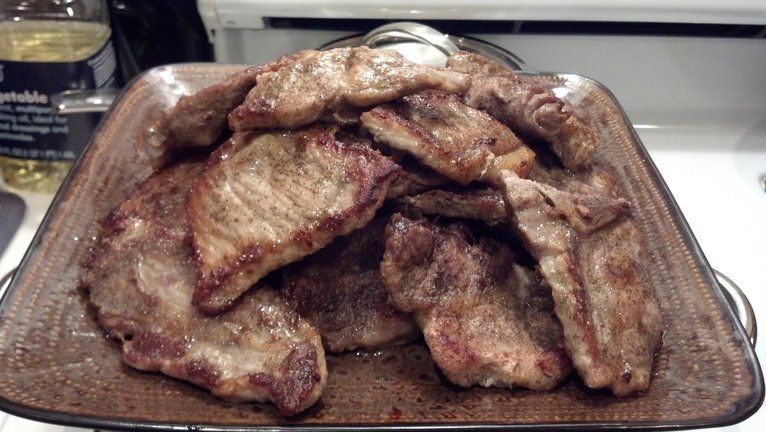
9 - thin sliced pork chops, cut into pieces
2 Tbsp vegetable oil
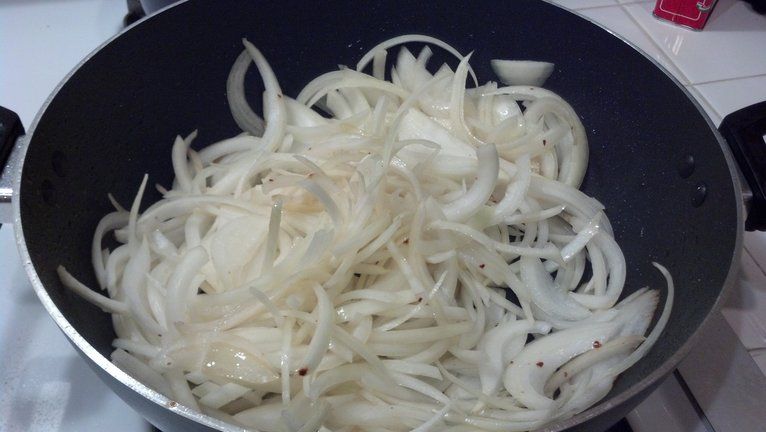
2 onions, sliced thin
2 tsp crushed garlic
1 diced tomato
salt
pepper
3 Tbsp Hungarian sweet paprika
1 1/2 cups water
1 Tbsp chicken bouillon
1 cup sour cream
1 Tbsp flour
Heat oil in large caldero or chicken fryer over medium to medium high heat. Trim excess fat from pork chops and cut into 3" pieces. Salt and pepper the pork. Brown the pork in oil in batches and set aside. When all of the pork is removed from the pan, add the onions and saute until translucent. Add garlic and tomato and saute for a couple of minutes. Add the pork back to the pan with the water and chicken bouillon. Set the heat to low and simmer for 45 minutes. Once pork is very tender and onions are nearly disintegrated, add flour to sour cream and add approximately one cup of sauce to sour cream/flour mixture to temper and pour over contents of the pan. Mix thoroughly. Serve over nokedli or spaetzle. I'm sure rice or egg noodles would work too!
Nokedli/Spaetzle
2 cups flour
2 eggs
1 tsp salt
3/4 c milk or water
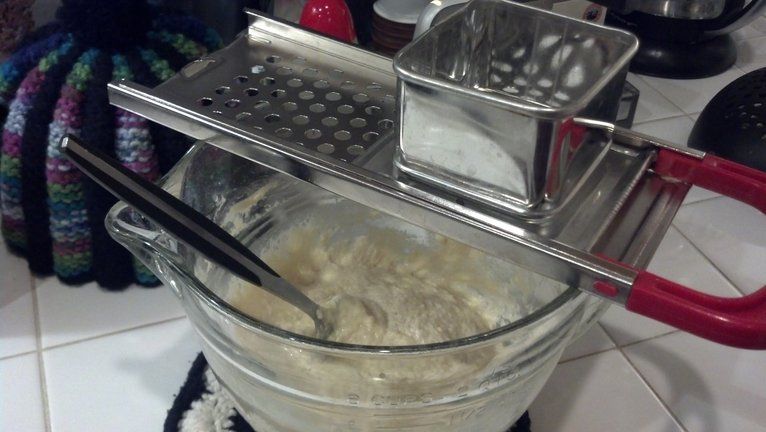
Mix all ingredients thoroughly. Using a spaetzle maker, drop dough over boiling salted water. Cook until the dough rises to the top. Drain but don't rinse. Serve with paprikash on top. Yum! I also like to make spaetzle and after it has drained, I will saute in some lightly browned butter and top with Parmesan cheese. YouTube has many spaetzle/nokedli videos. I bought my spaetzle maker from Amazon.
Sunday, December 23, 2012
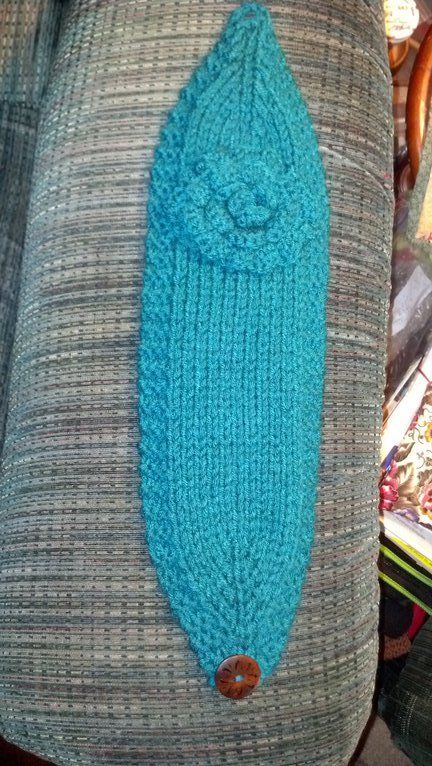
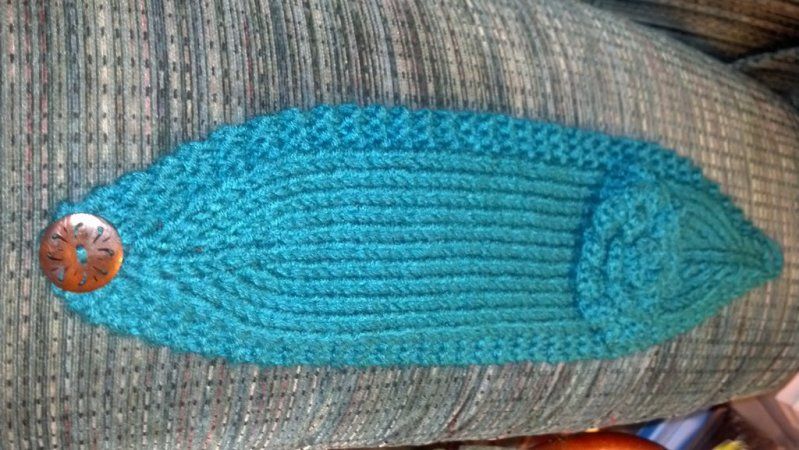
Knitted headband/earwarmer
Sorry for the cell phone photos but these are all I had of this headband/earwarmer.
I am not a good pattern writer but this seems straightforward to me.
Knitted Headband/Earwarmer
Worsted weight yarn held double throughout
Size 11 US knitting needles
1 button 30mm
M1 by YO
CO 5 sts and knit across. You will be increasing in the stitches before and after the center st so you may want to mark it.
Row 1: K2, YO, K1, YO, K2 = 7sts
Row 2: K2, purl YO through back loop (PYOBL) throughout so as to leave no holes, P1, PYOBL, K2
Row 3: K3 (from now on K3 selvedge sts on each side on every row), YO, K1, YO, K3 = 9sts
Row 4: K3, PYOBL, P1, PYOBL, K3
Row 5: K3, K1, YO, K1, YO, K1, K3 = 11 sts
Row 6: K3, P1, PYOBL, P1, PYOBL, P1, K3
Row 7: K3, K2, YO, K1, YO, K2, K3 = 13 sts
Row 8: K3, P2, PYOBL, P1, PYOBL, P2, K3
Row 9: K3, K3, YO, K1, YO, K3, K3 = 15sts
Row 10: K3, P3, PYOBL, P1, PYOBL, P3, K3
Row 11: K across
Row 12: K3, purl across to last 3 sts, K3
continue rows 11 & 12 until there are 31 garter row bumps (along selvedge edges) ending with a row 12.
Decrease rows:
Knit side: Work opposite of increase rows by K2tog before and after center st.
Purl side: K3, purl across to last 3 sts, K3
Decrease until 5 sts remain then BO leaving 12" tail
Use tail to crochet 3 chains and attach to opposite side. Weave in ends. Sew on button and accessorize with a crocheted flower of your choice.
Thursday, October 25, 2012
Crocheted dog harness
Using 2 strands of yarn held as one, chain 43. Work sc in next 42 sts. Work 3 rows in sc. Chain 36 and join to other end of strip. Work 3 rows in sc. Work 5 sts along short edge and work sc dec in next three rows until you have 3 sts left. End and leave a long tail. Do the same to other short end. Sew on a side release buckle to each end. This is to keep the harness attached to your dog. Then I tatted a loop on each side to attach the leash clasp to. If I had some metal D rings I would have used those instead but these are nice and work very well.
Wednesday, October 17, 2012
Tuesday, October 09, 2012
Argo Tea Bottle Cozy
I didn't waste any time making this cozy for my tea bottle. After brewing some green tea in my bottle, I realized it was too hot to handle. I crocheted this cozy using a size I hook and some Lion Brand cotton yarn. Round 1: ch4 then dc 11 in 4th ch from hook. Sl st in top of 3rd ch of beginning st to join. Ch 3 & turn. Round 2: Make dc in same st as ch 3 then 2dc in each st around. Join w/sl st. Ch 3 & turn. Round 3: 1 dc in back loop of each st around. Join w/sl st. Ch 3 & turn. Rounds 4 - 10: 1 dc in each st around through both loops. Join w/sl st. Ch 3 & turn, except for round 10 where you'd end w/sl st. End off & weave in ends.
Argo Tea
Whilst shopping at my local Albertson's tonight, I spotted this tea. I was originally drawn to the heavy glass bottle but the flavor, mojitea, is what made me buy it. It is a combination of lime, mint tea, and pure cane sugar. This turned out to be some of the worst tasting tea I've ever had! I couldn't even finish the scant 13.5 ounces. Hopefully, my $2.99 will not be entirely wasted and I can reuse the bottle as sort of a travel tea tumbler for green tea. I'll bet if I put the tea leaves into one of my reusable drawstring tea bags it will work. Cross fingers!
Friday, September 07, 2012
Salads in Jars
Salads in jars! Why is everyone doing it? Because they're freaking awesome, that's why! My first attempts are pretty boring but still great. I made these on Wednesday and ate one the following day. The lettuce was so crispy, as were the mushrooms and golden cherry tomatoes. I added ham, cheese, and Greek Feta dressing. Yum! They're supposed to last at least a week. I made 3 all together and the other two still look great as do the strawberries I jarred on Monday. Oh, I vacuum seal them as well. I have a FoodSaver machine ($$) but I also bought a little hand-held model for $20 at WalMart that works very well. If you want to keep the jar lids intact, you'll need to get a wide mouth jar vacuum attachment. If not, you can puncture a hole in the lid with a thumb tack, lightly cover with a square of electrical tape, then place the hand-held vacuum sealer over the tape and seal. Listen for the change in sound and you might even hear a slight "pop" as the lid is sealed.
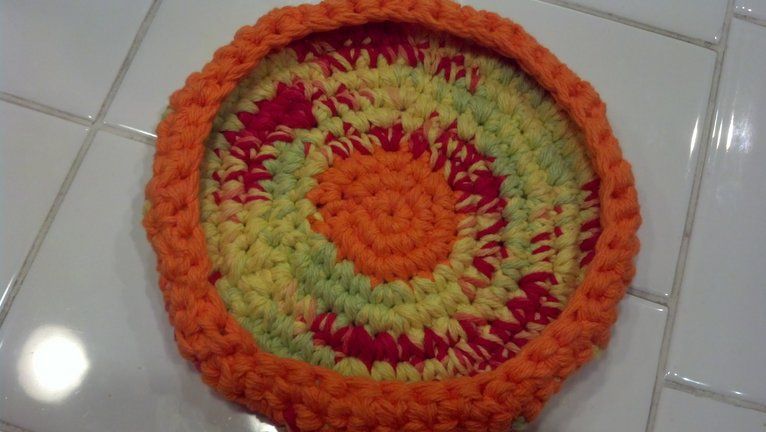
Crocheted "frisbee-like" disc
I came up with this:
Crochet hook size I
Worsted weight cotton yarn held double throughout. Make color changes as desired.
Rd 1: Using magic loop method, make 6 sc in loop. Join with sl st in 1st sc, ch 1 and pull closed.
Rd 2: Work 2 sc in each sc around. Join with sl st in 1st sc, ch 1.
Rd 3: *Work 2 sc in next st then 1 sc* around. Join with sl st in 1st sc, ch 1.
Rd 4: *Work 2 sc in next st then 1 sc, 1 sc* around. Join with sl st in 1st sc, ch 1.
Rds 5-9: *Work 2 sc in next st then 1sc, 1sc, 1sc* around. Join with sl st in 1st sc, ch 1.
Rds 10-11: *Work 2sc tog in next st then 1sc, 1sc, 1sc* around. Join with sl st in 1st sc, ch 1.
The decreases in these last two rounds create the lip of the disc. Fasten off and sew in ends. Done! Go fly a disc! Beware, you can't make just one!
Thursday, August 30, 2012
Bento bag lunch kit
I have a container that measures 8.5"L x 5.5"W x 3" H. I figured that I wanted it a bit more than 2x taller than my container. My pattern pieces measured 15" W x 12" H with 3" notches cut out at each corner. You can get instructions on how to customize your bags here. Besides making my fully lined bag, I also made a matching napkin and a sleeve for my chopsticks which ties shut at the top. I love it. The colors are so bright!
The pink and blue set were my first attempts. I don't know what I was thinking when I cut the fabric. I only had enough for one side of each color! Doh! So it's unlined and half is pink print and half is blue. It also was meant to be like the black one, taller and with a drawstring, but I didn't realize how short it was until after I cut out the corners for the boxed corner and knew I had to add height, which wound up being 4x the height measurement of my container. I altered it to mimic another bento bag I saw online with the ties. It's still cute, just not what I wanted. It's all good, though. Now I have two kits!
My friend, Steph, and I are going to a couple of Asian markets tomorrow and I'm going to keep my eyes open for more bento accessories.
When I was a kid, going on a field trip for school meant taking a bento lunch. They weren't the cute things you see on the blogs. They consisted of a bed of rice sprinkled with furikake (toasted seaweed with sesame seeds), maybe ume (pickled plum), teriyaki beef, a piece of fried chicken, and a piece of Spam. It was perfect because it didn't need to be refrigerated and would keep until lunchtime. Add to that a can of fruit punch or passion-guava juice that I froze the night before and it was great! Almost better than the field trip itself! I felt so sorry for the kids who brought sandwiches! My field trip days are over now that my youngest son is in middle school. Boy, I wish I had thought of this earlier! Maybe I can persuade him to take a bento for lunch?
Friday, August 10, 2012
Grow green onions in water
I saw this idea in Pinterest. There are several fruits/veggies you can grow this way by putting a slice, pit, root end, etc in water rather than throw them away. I think we all did this with potatoes, avocados, or beans when we were kids, right? I bought these green onions at a local farmer's market three weeks ago and have already cut them down three times!
Saturday, August 04, 2012
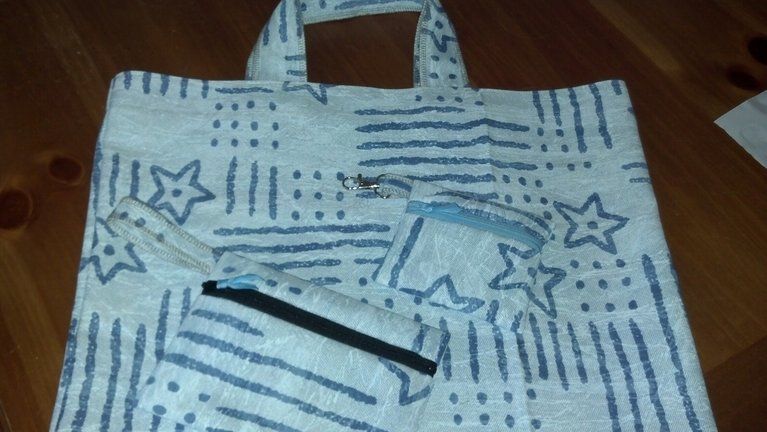
Tote bag and zippered pouches
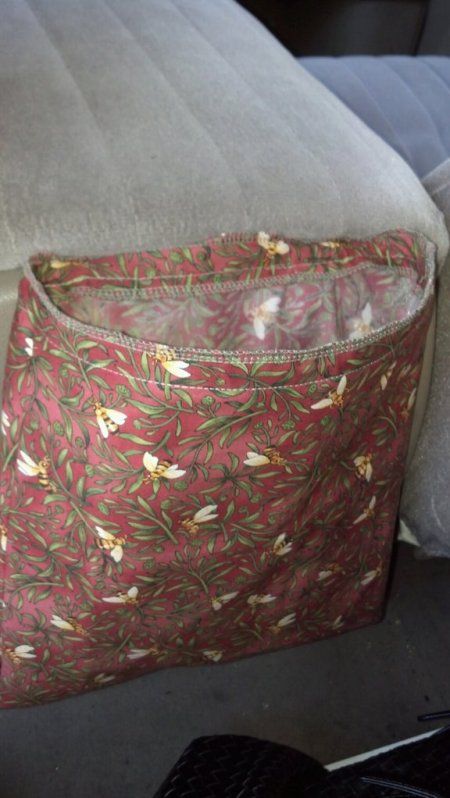
Car trash bag
Sunday, July 01, 2012
Crochet Baby Barefoot Sandals
The following are just my notes & not a pattern:
Using sz 3 crochet thread & sz D (3.25 mm) hook, Ch 8. Join.
Ch 3, 2dc in loop, turn
Ch3, dc in same st. Dc in next st. 2dc in top of ch3 from previous row. Turn.
Continue inc in this manner until last row is made of 9 dc. Ch 36 and cut thread. Join @ top of other side & ch 36. Cut thread. Weave in ends. Make 2 flowers and attach to top of feet.
Flowers: ch 8 and sl st in 1st ch. Ch 8 and sl st in same ch. Repeat until you have 8 loops. Cut thread and pull end through center of flower. Pull tail until center closes almost closed. Make another flower this way but only ch 6 instead of 8. Pull tail tightly closed, stack atop larger flower and feed tails through larger flower then pull larger center tightly shut. Attach to top of sandal. Repeat for other sandal.
Saturday, June 16, 2012
New phone
Just got a new Motorola Droid 4 today. Just playing around on it. Things I hate about getting a new phone are that I have to reinstall my apps and ringtones. I passed my phone down to my eldest son because he broke his and isn't due for an upgrade for awhile. At least I can see what apps I had before he totally wipes my old phone clean!
Friday, June 01, 2012
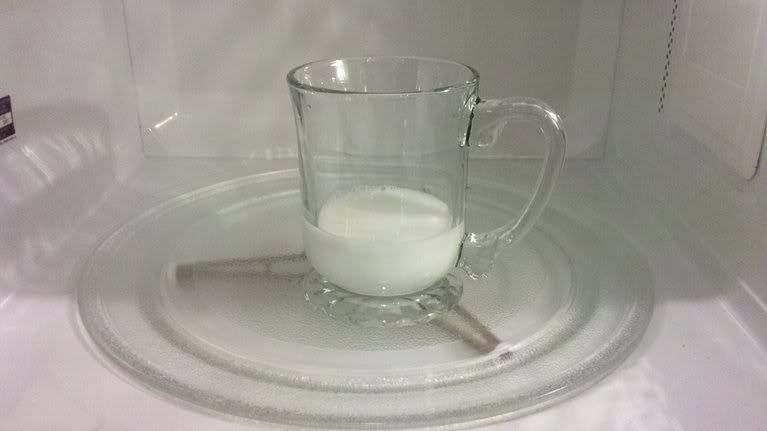
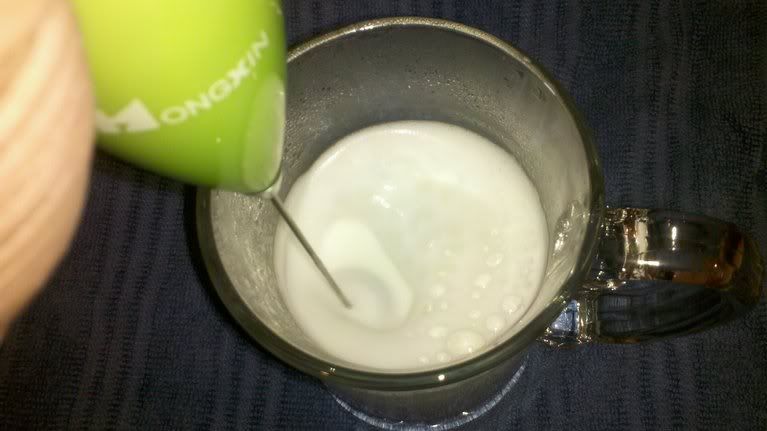
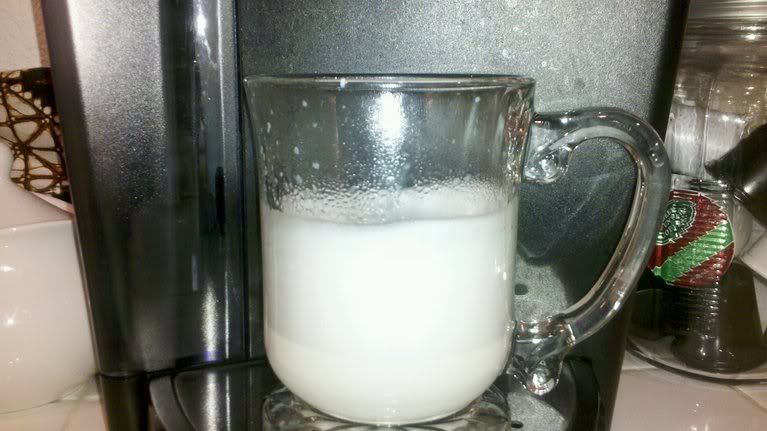
How to make a cafe latte with your existing Keurig without buying the new Vue!
Step 1: Pour about an inch of milk in the bottom of your coffee cup and microwave for 40 seconds.
Monday, March 26, 2012
A new DIY Kick Spindle (Mother Marion's Spindle) for me!
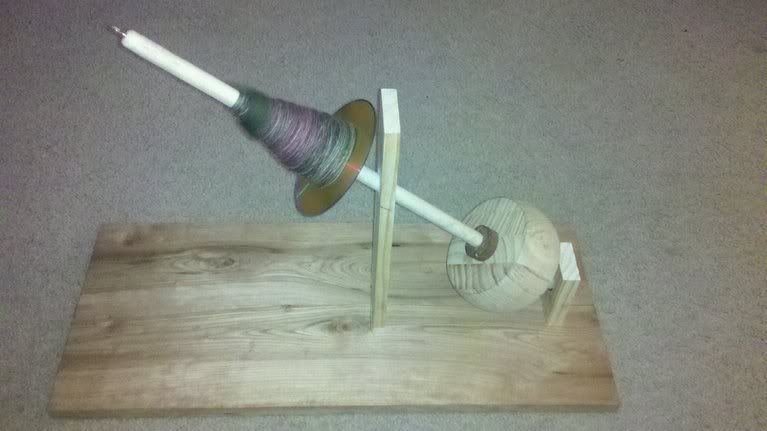
I think he'd be upset if he knew I was blogging this picture. He is not happy with the way it looks as I was urging him to just "slap it together" so I could use it already! But now that he knows how it works and the proper angles, he wants to make me another one, but prettier. Okay, I can live with that! LOL First of all, the base need not be so long but it is nice and sturdy without any wobbling or moving at all. That was my only complaint about the kick spindles I've seen for sale. The bases look too clunky and unstable. He also wants to find another ball bearing to go into the upright support so that it might spin longer and faster. He wants to make it more decorative by carving designs into the kick wheel and perhaps make it more portable. Right now you can remove the spindle, whorl and kick wheel but the upright support is fixed. It was a learning experience for him and I am the happy recipient of his experiment.