Sunday, March 13, 2016
3x4 Pocket Mini Album
I wanted to make a couple of little pocket albums to take on vacation to visit my mom. My oldest son hasn't seen her since 2009 and her memory has been getting progressively worse. I want to fill it before we leave with pictures I take while there.
I've based my album on the Sizzix Pocket Mini Album die.
Check out this video for basic instructions to put this album together:
https://youtu.be/LAbaNKYtVnY
Here are the measurements for this little album:
You can make this entire album with 4 sheets of 8.5" × 11" paper.
6pcs - 6.5"×4.75" (pockets)
Score @ 3, 6 long side & .75" short side
1pc - 3.25"×10.5" (cover)
Score @ 1.5", 2", 6", & 6.5" on long side
1 pc - 3"×1.5" (back pocket hinge)
Closure of choice, i.e. velcro dots, mini brads, and/or twine
One difference that I made is that I stick the hinge to the back of the cover
and cut the tab off the pocket in the front of the album.
Saturday, January 30, 2016
Easel back card template
Here is my version of an easel back card, which I based on the Artistic Impressions easel card die. The idea is that you decorate the front of the card and there is an attached easel so the recipient can stand it up and enjoy it. There isn't an inside of the card. If your cardstock is a nice heavy weight you can get away with just cutting one of these and it will stand up just fine. Otherwise, cut two and make one fold from the right and one from the left. Try to line up the circle punches as closely as you can so they line up when you have the easel out.
Tuesday, January 26, 2016
Easel back birthday card
I made this card for a friend's birthday this week. I love the idea of adding an easel to the backs of my cards and actually considered buying and easel die from Artistic Impressions for $30. Good thing I played around before shelling out the cash for that! I can make a very similar card to theirs by hand. I did, however, receive the Tim Holtz easel die for Christmas, and it is very nice to have. Now that I know how to make this easel, it's just faster to cut it by hand. This easel is similar to the Tim Holtz design.
The flower & foliage were made using the Stampin Up Bouquet Bigz L die. The paper is DCWV Linen Closet.
Saturday, May 09, 2015
10 cup thermal coffee maker...for less!
2L stainless steel wide mouth carafe
Melitta #4 filter cone
Melitta 10 cup thermal coffee maker
Red lentil sausage stew
It looks just like the one at F&E market! Mine does not.
I basically followed her recipe but added a keilbasa sausage and used red lentils. It's delicious! Thank you, Gluten-Free-Vegan-Girl!
Saturday, April 11, 2015
Applesauce Apple Pie Jam for Anthony
Today I made this jam for my son, who, upon finishing a jar my friend gave us, declared it his favorite jam. I called my friend for the recipe but, as usual, went my own route. It might turn out to come back and bite me in the butt if he doesn't like it. Rather than start with fresh apples, this jam starts with store bought applesauce. Here we go:
Makes 7 half pints
5 cups applesauce
6 tbsp Ball dry pectin
1.5 c white sugar
1.5 c brown sugar
1/2 tsp butter
1/2 tsp ground cinnamon
1/8 tsp ground ginger
1/16 tsp ground clove
1/16 tsp ground nutmeg
Prepare jars, lids, and bands as usual for canning.
Once this process starts it moves fast, so do yourself a favor and have everything premeasured and ready to go!
Meanwhile, place applesauce, butter & pectin in a large pot and bring to a full rolling boil. At this point add the sugars and spices and return to a rolling boil. Keep it at a boil for one minute.
Remove from heat and immediately ladle into hot, sterilized jars. Leave 1/4 inch headspace, get rid of large air bubbles, clean the mouth of the jar with a wet towel and place lid and screw on bands (not too tight). Return to canning pot and process 10 minutes.
Tuesday, December 30, 2014
CBTL Caffitaly Americano machine
Friday, December 05, 2014
Folded fabric Christmas ornaments
Sunday, November 02, 2014
No Chemex? No probem!
No carafe? A Mason jar works! Put a cozy on it and then the lid to keep the heat in.
I can see the Mason jar coffee maker on a road trip. I know I won't be traveling with my Chemex. No more crappy hotel room coffee (you're good as long as you have a way to make hot water). Pack all your supplies inside the jar and you're good to go!
I admit that a quart of coffee only fills my husband's monster cup and my measly 10 oz cup so I don't need to worry about keeping it hot unless I'm home alone.
Good coffee does NOT require any fancy equipment. People all over the world make coffee with much less.
Tuesday, October 21, 2014
Viva Las Arepas
In case you don't know what arepas are, they're kind of like a Venezuelan sandwich. They also have pork spareribs, chicken, and beef, which I assume are cooked over a wood flame, since the place smells of wood and there are logs stacked in the hallway. Here's what we ordered: Garlic Shrimp, Vegetarian, Reina Pepiada (cold chicken salad), Carne Asada, and an order of fried yuca and chicharron. It was too much food but we couldn't decide what to order. The tab was $35 for the two of us.
Chemex cozy and reusable cloth Chemex filters!
Saturday, August 09, 2014
Broccoli Cheddar Cheese Soup #2. Feels like I cheated, it's so easy!
6 cups water
4 tsp chicken bouillion (or more to taste)
1 pkg frozen broccoli florets & stems
1 carrot, julienned
1 stalk celery, diced
1 can Campbell's cheddar cheese soup
1 can Campbell's Chunky Chicken Cheddar Broccoli soup
1 cup shredded cheddar cheese blend
Pepper to taste
3 tsp butter
4 tsp flour
In a large pot, bring water & bouillion to a boil and add veggies. Cook until tender. In separate small pot, create a light roux by melting butter then adding flour and cook a few minutes, stirring constantly, but do not let it darken. Add 3 cups of the broth from the veggies to the roux and stir until smooth before pouring into large pot. Add the two cans of soup & pepper. Using an immersion blender, puree veggies but stop when it reaches desired consistency. I like mine more pureed than chunky. Stir in shredded cheese until melted. Enjoy!
Friday, July 18, 2014
Goodbye, my Sam
Broccoli cheese soup
I pretty much followed it except that I added chicken bouillon to my veggie stock because it was too bland and the only other spices I used were pepper, garlic and onion powders. I used one handful of shredded Mexican cheese blend and one handful of sharp Cheddar cheese.
32 oz vegetable broth
1 bunch of broccoli, chopped including stems (peel stem if very fibrous)
1 cup shredded or diced carrots
1 diced small onion
2 cloves garlic, minced
1 bay leaf
2 tsp chicken bouillon
In large pot (5-6 qt.), add all above ingredients and simmer until veggies are tender but not mushy.
In a small saucepan, make roux by melting 4 Tbsp butter and whisking in 4 Tbsp flour until completely blended and just barely turns darker. Remove from heat.
To the roux, add 2 cups of the broth from the veggies and whisk until smooth. Add mixture back into veggie/broth pot and bring to a low boil to thicken soup.
To the pot add 1 cup heavy cream and heat through. Lower heat and finally add 1 handful of shredded sharp Cheddar and 1 handful of shredded Mexican blend cheese. Make sure that you don't bring to a boil after cheese is added.
Sunday, January 26, 2014
Mason Jar Coffee Maker...and Mason Jar Tea Maker...and Cold Brew Coffee Concentrate Maker!
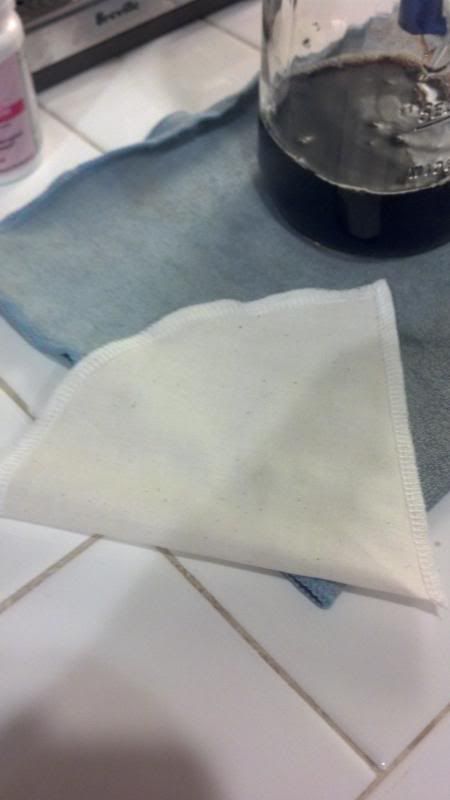
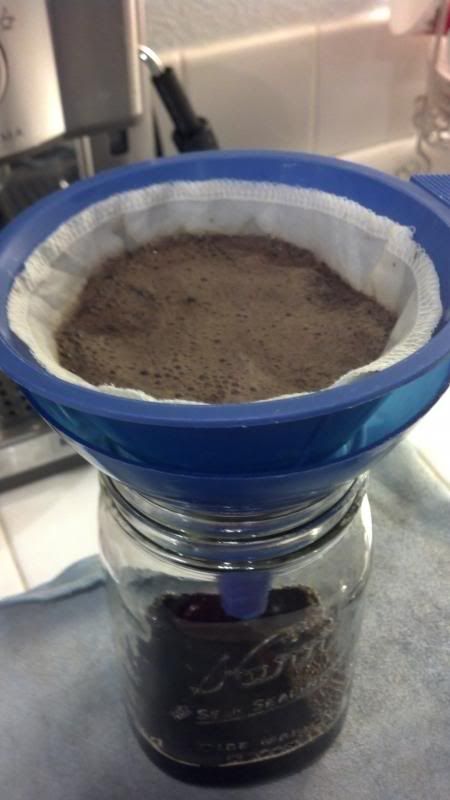
1) Insert the filter and fold over the edge of the jar. If you notice in a few of the pictures, the filter is a bit short, that's because I was testing this with my reusable cone filters. They work but I wanted more immersion of the grounds so I created a longer, more snugly fit, filter.
2) Screw on the ring securely. This also helps to stop the wicking of fluid and keeps it from dripping on the outside of the jar.
3) Add your ground coffee. Pour your hot water over the grounds. You don't have to do any special pouring method since the grounds will be immersed, it doesn't matter.
4) Let sit for a couple of minutes for full extraction.
5) Carefully unscrew lid and remove filter. The lid and jar will be HOT! It's nice that the outside edges of the filter are still dry so you can pick up the hot, wet filter and put into a nearby cup to cool before tossing the contents. Enjoy your coffee!
The jar got so hot that I had to crochet a cozy for it so as not to burn my hands. Just adds to the cuteness factor while being totally functional!
Oh! It also works with my Keurig just in case I don't have any K Cups available. You can make tea the exact same way.
You can also make a small batch of cold brewed coffee concentrate this way as well. This is a 1 qt jar so I'd use about a cup of coffee and fill the jar as full as possible with cool water. Put the lid on as well as the ring. Let sit 12-15 hours then lift out the filter, allowing the coffee to drip while squeezing lightly. Remember that the coffee grounds absorb a lot of the water so you won't have a full quart of concentrate when you're done. Toss the used grounds into your compost/trash. Refrigerate your concentrate and use within 2 weeks.
Monday, January 20, 2014
Stone Wave Bread Pudding
1 egg, beaten well
1/4 cup milk
Dash vanilla extract
2 Tbsp sugar
1 Tbsp raisins
2 hot dog buns (because that's the only bread I had), torn into small pieces
In the Stone Wave, mix first 4 ingredients well. Add raisins and buns, wetting buns completely. Cover and cook for 1 1/2 minutes. Turn over, cover and cook 1 minute more.
These are approximate times as all microwaves are a bit different.
Friday, September 13, 2013
Poor girl's Chemex
Monday, August 19, 2013
Stethoscope Cover

stethoscope cover
Originally uploaded by mrhodes702.
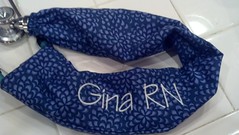
I made this stethoscope cover for my sister, Gina. I have been making her (and her co-workers) all different types of covers over the years, mainly knitted ones. I wanted to do this one because I'm just getting used to my embroidery machine and thought it might be nice to personalize her cover. I saw a cover on Etsy that uses minky on one side and I happen to have a small piece left over from a baby blanket. I will still put her name on it. She can't wait to get them! Before I forget, Here are my notes:
2 pcs - 4 1/2" x 25" for body
2 pcs - 4 1/2" x 3" for interfacing (same fabric as body)
1 pc - 4 1/2" x 4" for tab
1 pc - 3" length of 1/4" elastic
1 snap set
I serged most of the cover except for making the tab, sewing the casing for the elastic, and the top stitching around the top of the cover.
First off, I embroidered her name on one body piece. Then I made the tab by folding each 4" side towards the middle, pressed, unfolded, folded 1/2" up from one 4 1/2" side then both pressed sides toward the middle. Sew along 2 long sides and one short side. Sandwich the tab between the front piece and one interfacing piece, right sides facing, along a short side and sew. Sew the 2nd interfacting piece to the 2nd body piece, right sides facing, along a short side. Now this part might be confusing: Lift up the interfacing pieces so you have two long flat pieces and, with right sides facing, seam along one long side. Now make the casing for the elastic by folding up 1/2" on the other short side and press. Sew with a 3/8" seam allowance. Thread elastic into casing using a safety pin. As soon as the non pinned end enters the casing, tack it down so it doesn't get sucked into the casing. As soon as the pinned end exits the casing, tack it down so it doesn't get sucked back into the casing. Sew the remaining long edge, turn right side out and tuck the interfacing down into the body and top stitch 1/8" from the edge. Add one side of the snap set to the end of the tab, centering it. Add the other side of the snap, so that it corresponds to the tab, on the body. Finis!
I'm still playing around with the construction. I don't know if the tab is absolutely necessary. I may just forgo the tab on the next one and just add the snap set to the top of the cover. We shall see!
Friday, August 16, 2013
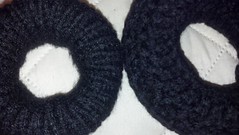
Knitted & crocheted donut bun maker

Knitted & crocheted bun makers
Originally uploaded by mrhodes702.
Worsted weight yarn. Donuts shown were made in Red Heart yarn. Use a color that best matches your hair.
Size US8 needles. CO 28 sts. Join and knit in the round for 10". Bind off, roll down with stockinette side showing, sew bound off edge to body matching stitch for stitch all the way around.
To make a larger diameter, just cast on more stitches. To make a fatter donut, work more rows.
The bun maker on the right was crocheted. I used an H size hook and chained 28 sts. Slip stitch to join in a circle, being careful not to twist the chain. Ch 2 and work a dc in each remaining chain. End each round by slip stitching into the top chain of the starting ch2. Work 20-30 rounds in DC. Occasionally, you can roll the tube down to see if you want all 30 rows. Stop whenever you like the size of it. End off and roll into a donut shape. Sew top edge of last row to body of donut matching stitch for stitch all the way around.
I use the screw type hair pin to secure the bun to my head. I typically use three. They're made by Goody and sold in practically any drug store. One of the biggest benefits of using these knitted or crocheted bun makers over a sock bun is that they have natural holes into which you can insert hair pins and I feel it's much more secure this way.
To learn how to style your hair using a bun maker or bun donut, go to www.YouTube.com and search "sock bun" or "bun donut". There are several videos to choose from.
Thursday, July 11, 2013
Beginning sock knitting
I knitted my first pair of socks in 1999. I found I disliked double pointed needles (love them now) and moved on to do the Magic Loop method then the 2 circular method (a la Cat Bordhi). I prefer Magic Loop for socks rather than 2 circs for many reasons, but primarily because it's cheaper than having 2 circs in several sizes available at the same time and not hung up in another project.
Someone on a FB knitting page was having a hard time learning to make socks and I was reminded of the site that helped me tremendously in those early days. I had to go to the Wayback Machine to find it. Here is the link. Full of helpful pictures all along the way. I don't make socks like this anymore as I prefer toe up, but it's a great way to learn the anatomy of a sock.